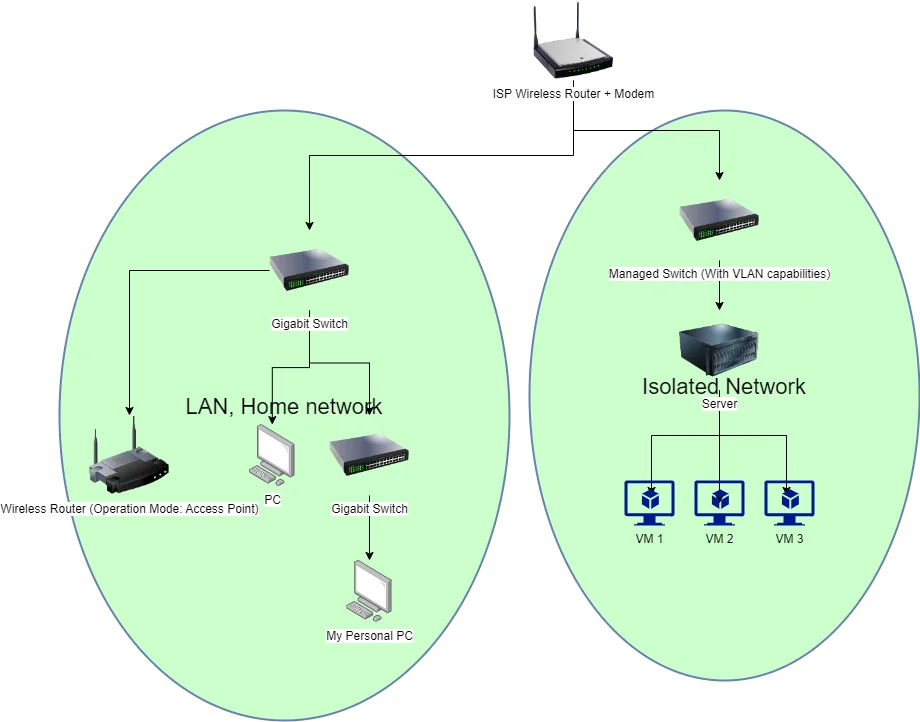
With hosting your own services\servers at home, comes managing them securely and ensuring that while your dog of a server is hanging out on the open internet it doesn’t bring home any proverbial “fleas” that make their way into the rest of your network.
Configuring VLANs to segment your servers\public facing machines away from the rest of your home network is always advised as this offers a network level hard-stop from any devices on one VLAN to communicate with any devices on another VLAN. The next layer of security should be trying to open as little as humanly possible to any outside attack vector, for which we will use a self-hosted VPN to connect back to our network securely.
VLANS
Assuming your home router\firewall\switch supports it, tying different devices to different virtual networks is always going to be your best bet at separating networking equipment from being able to talk to each other, therefore preventing any malicious actors from being able to sneak their way from the public facing machine onto anything you deem too private to be exposed to the general public.
I run a RT6600ax Synology router and Unifi AP\switching equipment, so it’s as simple as assigning a few different VLANs, setting up the switching equipment to accept those VLAN tags and then assigning those to the corresponding machines so we can create a “public facing” VLAN and a “private” VLAN.
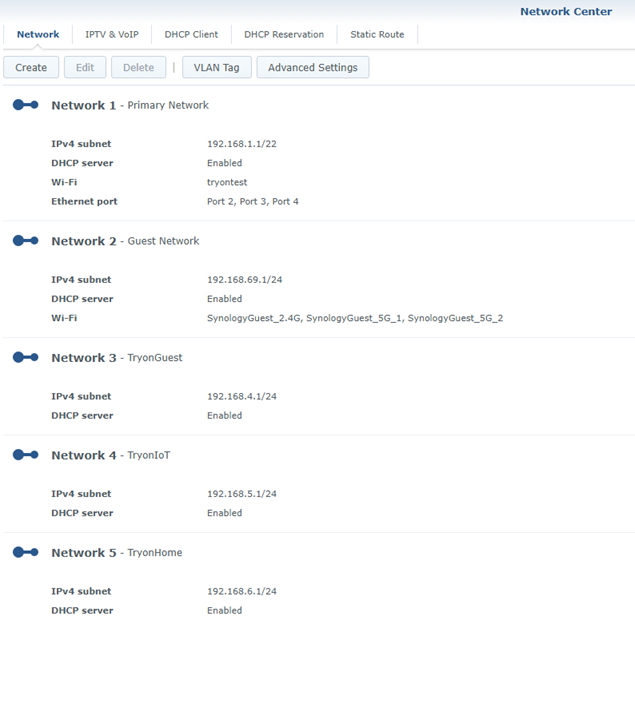
So I have untagged traffic over the primary network and all other private home Wi-Fi and gaming desktop etc. on TryonHome, guests who come to visit connect to TryonGuest, and any devices I don’t trust but need a Wi-Fi network go to TryonIoT for my Wi-Fi doorbell etc. These are all being broadcast from ceiling mounted Unifi APs to provide maximum coverage throughout raised ranch house\garage and all the ports have different allow\block rules in the Unifi controller to only allow ingress\egress from same-VLAN devices.
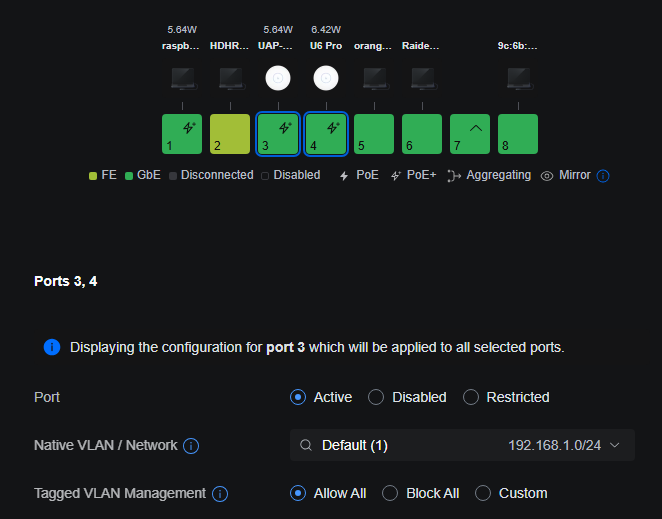
As you can see I have the 2 wireless access points configured to “allow all” traffic so that the access points are allowed to all the different SSIDs on their segregated VLANs to all pass traffic correctly. The other ports going to my PoE powered Raspberry Pi 5 is on my home VLAN, but all the other ports are on the untagged “flat” network and not allowed to interact with my home network at all except for specific firewall punching rules to allow certain IPs on certain ports (Plex media traffic to unRAID server, server management GUI etc.) to talk back from the flat to the trusted home network.
VPN access to different VLANs
So now you’re thinking “That’s great! My network is secure from it’s public facing machines so I have another layer of security working to keep me safe.”
Which is true…..BUT
It can make accessing certain things a royal pain. Remember the firewall punching I just mentioned? My initial configuration of this network approach was immediately met by many different small adjustments such as “oh this server needs to have a firewall port allow rule so it can connect to this so-and-so” and similar non-critical things that just needed to be gone through and addressed to be sure traffic could pass correctly and work as intended.
This meant that instead of feeling like everything was more secure, it felt like I broke my network. Suddenly everything wasn’t so simple to navigate anymore as sure I could RDP into my gaming desktop from my laptop as they were on the same local subnet with the same VLAN tagged traffic, but if I wanted to access my ProXmox server web-GUI from my laptop I had to RDP into my desktop to view it since that’s the only machine I had a firewall allow rule for that port to pass through from the “public” VLAN to the “private” VLAN.
But I realized there is a much better solution to solve these problems: Tailscale
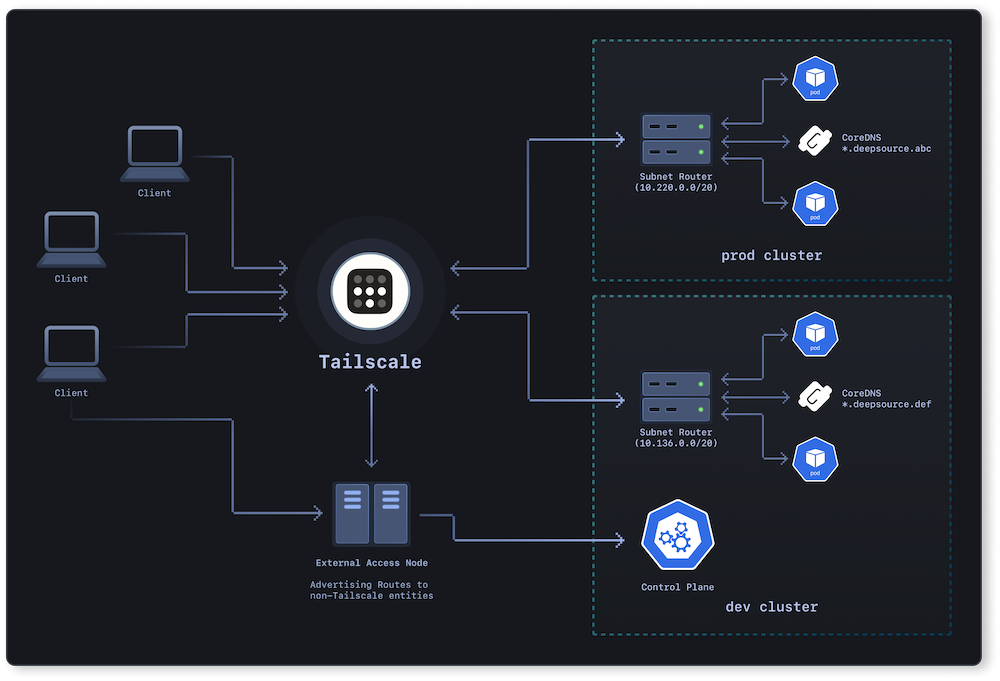
Tailscale takes some all of the pain away from not being able to access devices that aren’t on the same local network as you are, provided it’s configured correctly. You simply create a free account (if using for personal home use) add the Tailscale client to 2 or more machines and you can then access any machine connected to your aptly named “Tailnet” through it’s own VPN interface using site to site Wireguard tunnels, completely transparently to the user.
Wireguard is a very secure, robust and BLAZING fast VPN protocol. Unfortunately, managing it manually can be a giant pain, even if you are familiar with how to do it. It involves editing text files with matching information from the server machine to the client machine, generating trusted key-pairs between them, port forwarding the server side so there is a keep-alive tunnel being dug from client side out to server side, etc.
But rather than having to make a Wireguard tunnel from your server to your phone, then your server to your gaming computer, then your gaming computer to your phone, then you add your laptop to the mix which needs to connect back to your phone, then your laptop to your server, then your laptop to your gaming desktop (you can see this would get tedious quickly if you wanted universal access to all of your devices)
Instead, install Tailscale to a single machine on every trusted subnet, allow that device to be used as a “subnet router” within the client itself and then approve that access through your Tailscale “admin” console and you can then access any of those published subnets, even on machines that DO NOT have Tailscale installed on them, from anywhere in the world as long as you have an internet connection.
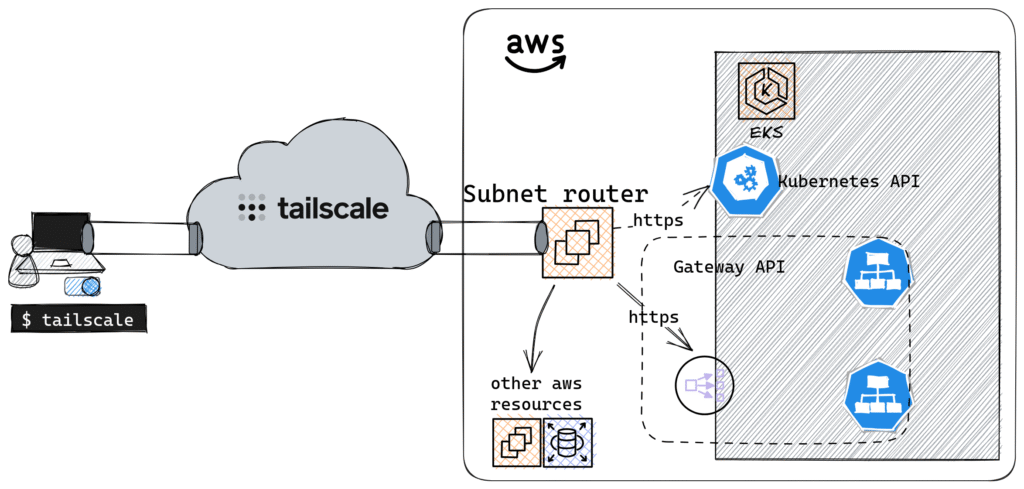
Normally Tailscale gives each device that you join to your Tailnet a unique (to your tailnet) 100.X.Y.Z IP schema. So if you have 2 devices with Tailscale IPs of 100.0.0.5 and 100.0.0.6, you can ping and pass traffic to\from each of those IPs to the other as if they were on the local area network, even if one is at your home in America and the other is in a data center hosted in Europe, all through an encrypted Wireguard tunnel, with any firewall punching necessary being taken care of by the clients themselves so no technical knowledge is really necessary from the user once it’s initially setup.
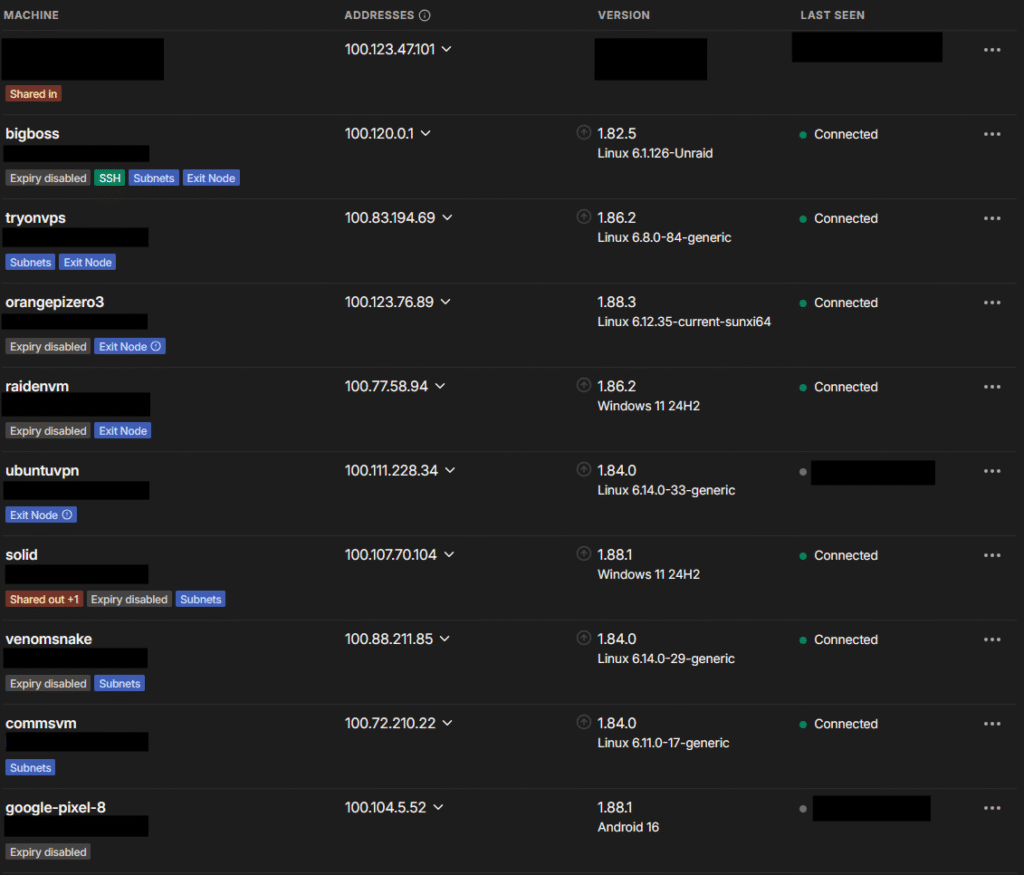
So if I have my Google Pixel 8, I can flick on the Tailscale app, hop over to http://100.120.0.1:32400 and access my self-hosted Plex instance from anywhere, cellular or Wi-Fi, without needing any complicated reverse proxy, port forwarding or any other networking knowledge. I could even type bigboss:32400 in my browser window and it would resolve to the same address, as Tailscale also includes its MagicDNS which automatically resolves the given host name in Tailscale, which defaults to the computer name, but can be changed, as can the Tailscale 100.X.Y.Z IP address if you would like.
I can even RDP into my gaming desktop from my laptop as long as Tailscale is enabled on both devices, or even use Sunshine and Moonlight to seamlessly game on the go, playing the game\media on my gaming computer (to utilize it’s powerful hardware) and stream the resulting video\audio to my laptop, allowing me to play games from my couch in the same house, at my friend’s house on their Wi-Fi or even a hotel room.
The REAL magic comes in once you configure the subnet router though. Once you designate a device as a subnet router and publish it through your Tailscale client to authorize that type of connection, you can even access devices that ARE NOT running Tailscale, by way of the device acting as your subnet router.
So let’s say I have my printer connected to my “TryonHome” Wi-Fi network, which is on the same network my home laptops\phones connect to, and my gaming desktop is a part of the same VLAN via a wired connection to the Unifi switch. But I want to print a document to my home printer, but I’m stuck at work, or I’m otherwise not available to get home to print that document out.
If I publish my gaming computer as a subnet router (and the device is on with Tailscale enabled) then that device will act as a sort of “go-between” and translate the traffic from the remote device, to the printer’s private IP address, via Tailscale. So instead of me having to find a PDF on my phone, hit print and then point it to an IP address of a Tailscale IP, I can point it to the actual private IP address that my Synology router has given that printer and the gaming computer acting as a subnet router will pass the “192.168.1.20” IP address to the printer as if it was on the same network and I was sitting on my home’s Wi-Fi network.
Leave a Reply